Modulate Drum Samples

image

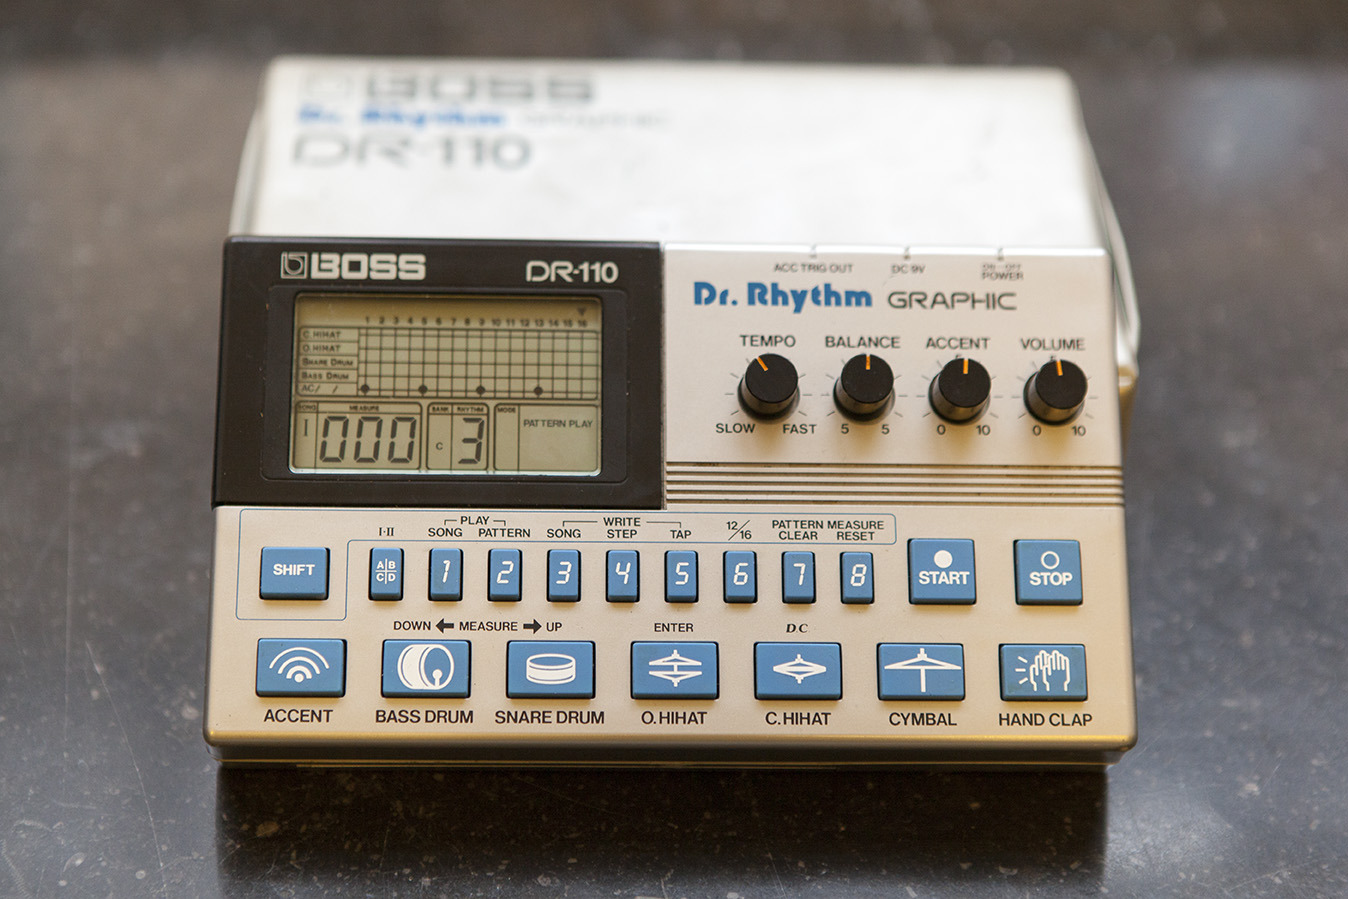
I got a few old drum machines, some analog and some digital. Sometimes I use theme with their internal sequencers synced to the tracks rooted in the DAW. I do this because working with hardware and limitations can be fun and inspiring.

Still, most times it could feel a little time-consuming and inconvenient. So I sample and set up a Drum Rack in Ableton Live, which is much more practical but at the same time could generate a more stiff and lifeless expression when using fixed samples.

To remedy this you could take some steps. You could use several samples of the same drum and switch playback in a round-robin style (read this tutorial on the Ableton website).

Another technique I usually tend to is setting a randomized velocity on the hihats for accents. In Ableton Live:

  1. Add a Drum Rack to a MIDI track.
  2. Put a hihat sample on a pad.
  3. Before the Simpler, add the Velocity MIDI effect.
  4. Set Random <20 (greater than 20 could affect the overall volume in bad way, and an added compressor later on could try to even out the intended small modulations).

Also try add a groove to your pattern.

  1. Goto Grove in your MIDI clip.
  2. Click om the hot-swap button.
  3. Choose whatever you like, e.g. MPC 16 Swing-58 is really nice.
Standard

Sound Monitoring on Different Systems

While I think it’s important to be monitoring music productions on several systems, this time it has become more of a biproduct of premisses in the making of my new recording.

Now my main monitors are the Genelec 8030A which sounds clear but lacks a little bass. And because the home studio is located in the bedroom (not acoustically treated) I also listen on headphones a lot. I use Sennheiser HD 25-1 II which sounds pretty balanced and good, although not too comfortable.

Sometimes I must to shift place (to the dinner table) and work solely in the box (meaning Ableton Live), and sometimes I mix, mala fide, on the classic Koss Porta Pro on ear headphones.

I’m playing the music on a smaller hi-fi home system (NAD C 320BEE amplifier and DALI Concept 2 speakers with 6.5” woofer/midrange) to get more bass, and to add a larger room ambience and noise to the experience.

I also listen to bounces of the mix on Apple’s muffled EarPods, extensively, because I want the music to sound okay there too. And when outdoors I listen on the wireless Bose SportSound (that aren’t noise cancelling).

I’ve also listen on the shitty laptop speakers of my MacBook Pro and on speakers of the iPhone, just do hear which frequencies are coming through hard and how the sub translate on tiny speakers.

And lastly, I try to listen not only focused, but also in the background with people talking, while cooking and such. This is not very scientific, but I sometimes hear annoying frequencies or other things in the music that I normally wouldn’t recognize.

All this monitoring aims to find a mastering sweet spot for music to sound as intend. That means, perhaps not the “best” from a technical point of view, but from at sound, mood and feel perspective. In music, I’m trying to communicate and achieve something that has not necessarily to do with audiophile correctness or fine sound reproduction. Controlled and uncontrolled dirt and noise are most welcome in my music.

Standard

Sound Monitoring on Different Systems

While I think it’s important to be monitoring music productions on several systems, this time it has become more of a biproduct of premisses in the making of my new recording.

Now my main monitors are the Genelec 8030A which sounds clear but lacks a little bass. And because the home studio is located in the bedroom (not acoustically treated) I also listen on headphones a lot. I use Sennheiser HD 25-1 II which sounds pretty balanced and good, although not too comfortable.

Sometimes I must shift place (to the dinner table) and work solely in the box (meaning Ableton Live), and sometimes I mix, mala fide, on the classic Koss Porta Pro on ear headphones.

I’m playing the music on a smaller hi-fi home system (NAD C 320BEE amplifier and DALI Concept 2 speakers with 6.5” woofer/midrange) to get more bass, and to add a larger room ambience and noise to the experience.

I also listen to bounces of the mix on Apple’s muffled EarPods, extensively, because I want the music to sound okay there too. And when outdoors I listen on the wireless Bose SportSound (that aren’t noise cancelling).

Moreover, I listen on the shitty laptop speakers of my MacBook Pro and on speakers of the iPhone, just do hear which frequencies are coming through hard and how the sub translate on tiny speakers.

And lastly, I try to listen not only focused, but also in the background with people talking, while cooking and such. This is not very scientific, but I sometimes hear annoying frequencies or other things in the music that I normally wouldn’t recognize.

All this monitoring aims to find a mastering sweet spot for music to sound as intended. That means, perhaps not the “best” from a technical point of view, but from at sound, mood and feel perspective. In music, I’m trying to communicate and achieve something that has not necessarily to do with audiophile correctness or fine sound reproduction. Controlled and uncontrolled dirt and noise are most welcome in my music.

Standard

Mixing at the Right Levels

There’s this theory of the ear that it hears different frequencies at different levels. The Fletcher-Munson curves, commonly known as equal-loudness contours, indicate the ear’s average sensitivity to different frequencies at various amplitude levels.

image

Even if the tonal balance of the sound remains the same, at low volume, mid range frequencies sound more prominent. While at high listening volumes, the lows and highs sound more prominent, and the mid range seems to back off.

In short, this explains why quieter music seems to sound less rich and full than louder music. Generally it’s better for the music to sound good as the volume increases.

As a consequence of this, you should edit, mix and work on your music on a high enough volume (not ridiculously loud), so that you can make sure your music doesn’t sound terrible when it’s listened to at a higher level. Because as a music producer you would want your music to sound best when the listener is paying full attention. But use caution, don’t damage your ears bla bla bla.

Standard

Vocal Delay Ducking

The normal thing to treat a dry vocal is to put reverb and delay on it. But that could make the vocal a bit muddy.

To keep it in-your-face and conserve the clarity of the vocal, while still having an effect to make it sound bigger, try ducking the volume of the delays whenever the dry vocal is active. To do so, side-chain the delay bus to the lead vocal track.

For example, use a delay device on a return bus and put a quarter note delay with low feedback, and send it to the vocal track with a little less volume. On the same bus, put a compressor and select the vocal track as the side-chain source. Set it up as you like, perhaps bring down the wet-parameter some.

You can also try the same thing with a reverb.

Standard

Split Frequency, Split

I’ve written about the perks of putting side-chain compression on only the low frequencies of a bass earlier.

To do so, three copies of the sound are needed. Or, as this post will show, you could split the frequency into three bands (high, mid and low). By doing this, it is possible to apply different signal processing on each band.

Now I usually try to write about music production on a more abstract level, and not about a specific DAW or instrument, but this time I going to illustrate with Ableton Live on Mac. The theory is the same though, you just need to figure out how it works in your particular environment.

So I’m using the stock effect Multiband Dynamics to split frequency. The device has noticeable affect and coloration on the signal, even when the intensity amount if set to zero, but it should be transparent enough for now.

  1. Drop a Multiband Dynamics in the Device View.
  2. Set the Amount control to 0.0 % to neutralize compression or gain adjustments to the signal.
  3. Group the Multiband Dynamics in an Audio Effect Rack (select the device and press CMD + G).
  4. Show the Chain List of the rack.
  5. Dictate the crossover points on High and Low (the Mid consists of what is left in between, so remember to also change the crossover points in the mid chain if you make adjustments on the others), e.g. set the bottom of the frequency range of the high band to 1.00 kHz.
  6. Duplicate the selected chain two times.
  7. Rename all of the chains High, Mid and Low, from top to bottom.
  8. Solo each band respectively on the Split Freq, i.e. solo Low on the low chain.

Now process each band individually. Use a Utility device on the low chain and set Width to 0.0 % to direct the low frequencies to mono. Also, on this band, set up a side-chain compression triggered by the kick drum. Try a stereo widening effect and some reverb on the mid chain. And perhaps a little saturation to add some crunch on the high chain, I dunno, it’s up to you.

Standard